So, My 3D printed Smart Wallet broke ![]() .
.
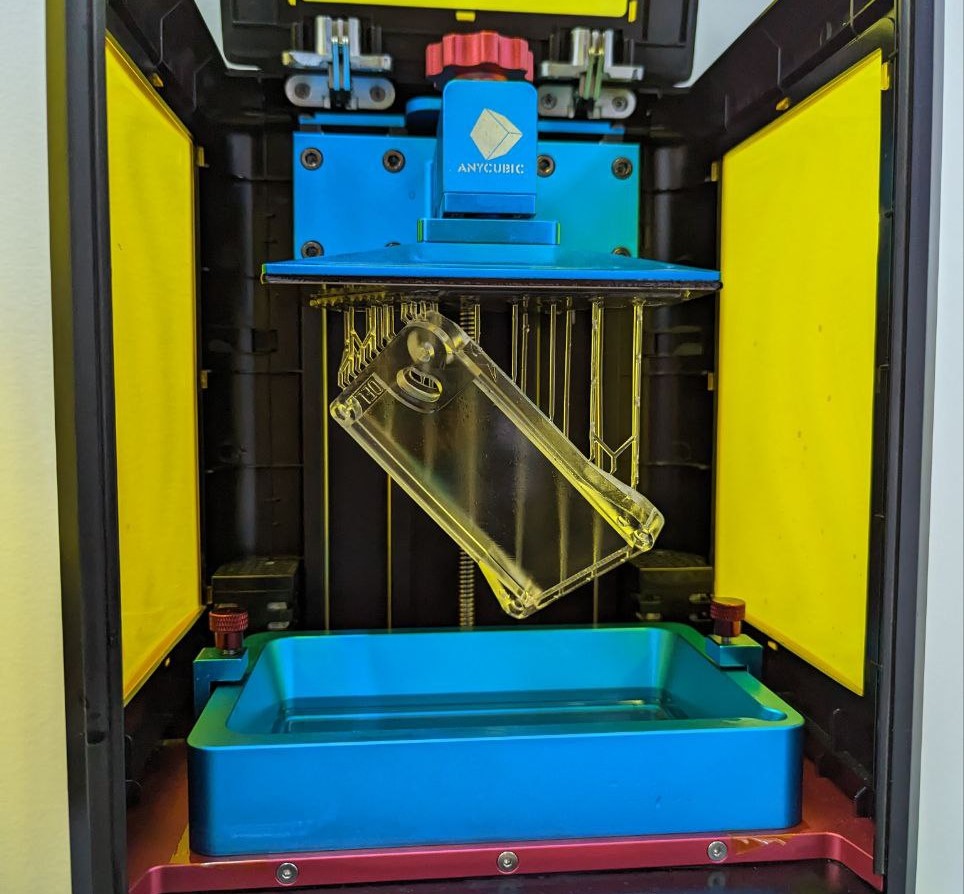
I always appreciated that it integrated cards and coins in such a sleek and nifty way (boo to money clips). The design, however, was greatly limited by the pure FDM (Fused Deposition Modeling) approach. Since I was interning at HOPE Technik, I was challenged to design and build a new mechanical wallet using the resources available (with permission of course!). This provided me the ability to work with other production methods, namely DLP (Digital Light Processing or Resin Printing):
And Waterjet cutting:

Exciting!
Design Considerations
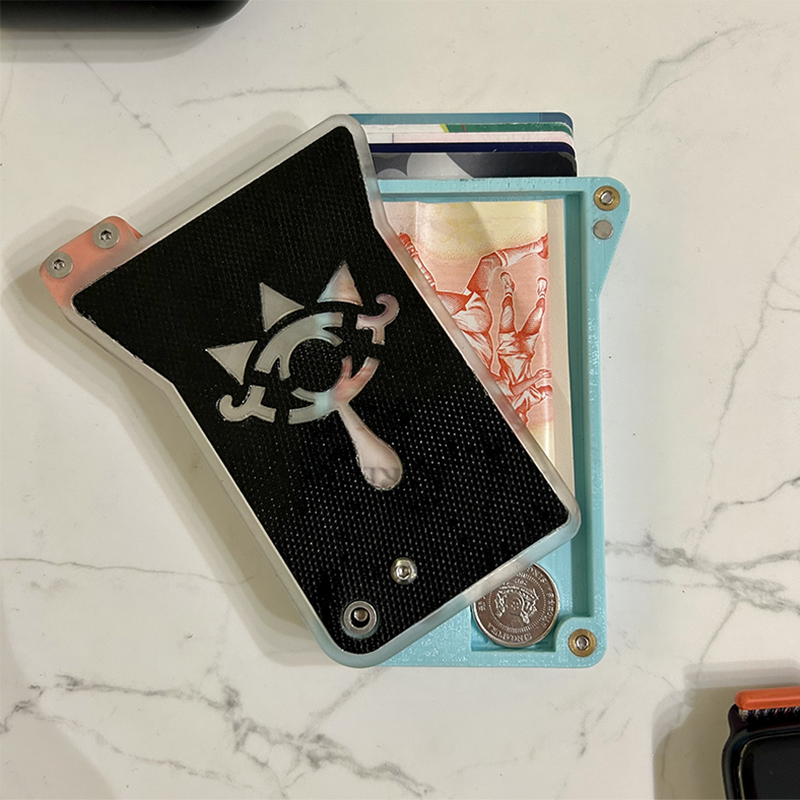
The original Smart Wallet had two compartments: a front compartment for coins, keys and receipts and a rear compartment for cards. The lid of the wallet could rotate to reveal the front compartment, while also pushing a lever that fanned the cards out of the rear compartment when opened. My wallet would emulate this, while resolving two major issues with the original design:
- Rigidity Issues: the wallet was made of thin PLA layers that caused it to have reliability issues. It was also prone to cracking and warping.
- Unusable Front Compartment: As the lid was weak and the compartment was too narrow, I was unable to use it to store cash or coins properly. This was a key issue I wanted to address.
Mk1: Sheet Metal
The first design took a month of planning. To combat the rigidty issues, I opted for stainless steel M3 fasteners, as opposed to press fitting the FDM parts together like in the original design. For the lid pivot, I opted for a lock nut to ensure that it didn’t squeeze the lid too tight and interfere with lid movement.
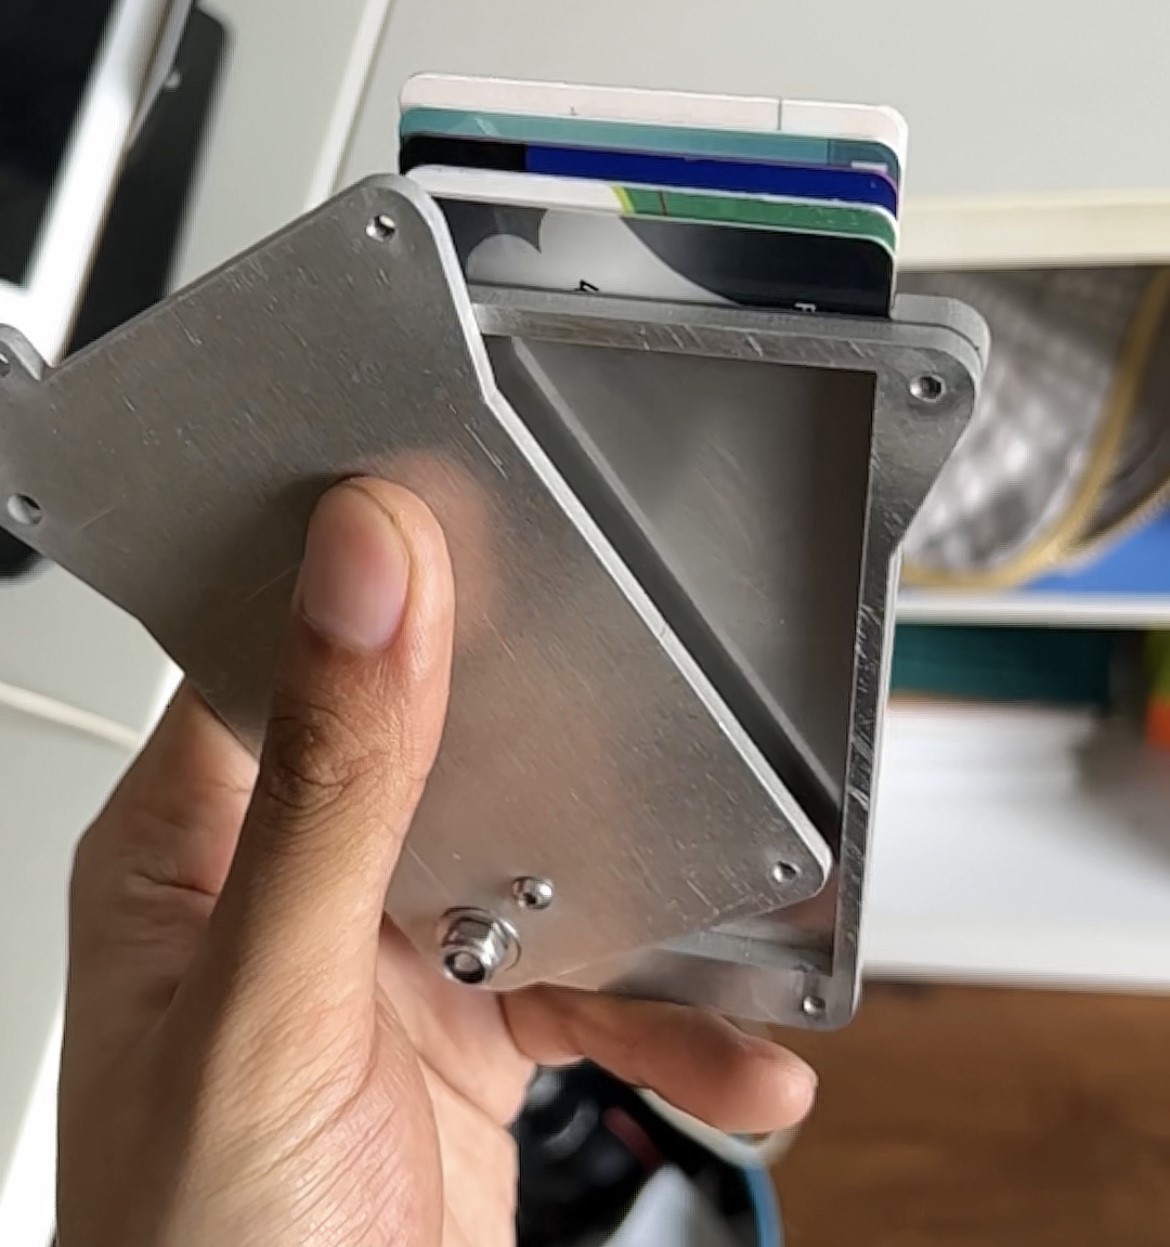
Following the likes of The Ridge and Aviator, I also wanted to go with a pure sheet metal (aluminium) approach, coupled with a ball plunger locking mechanism. However, I found the design too heavy and cumbersome. The pure sheet metal approach also severely limited the design, as I had to work with a layer by layer approach.
Mk2: Back to FDM
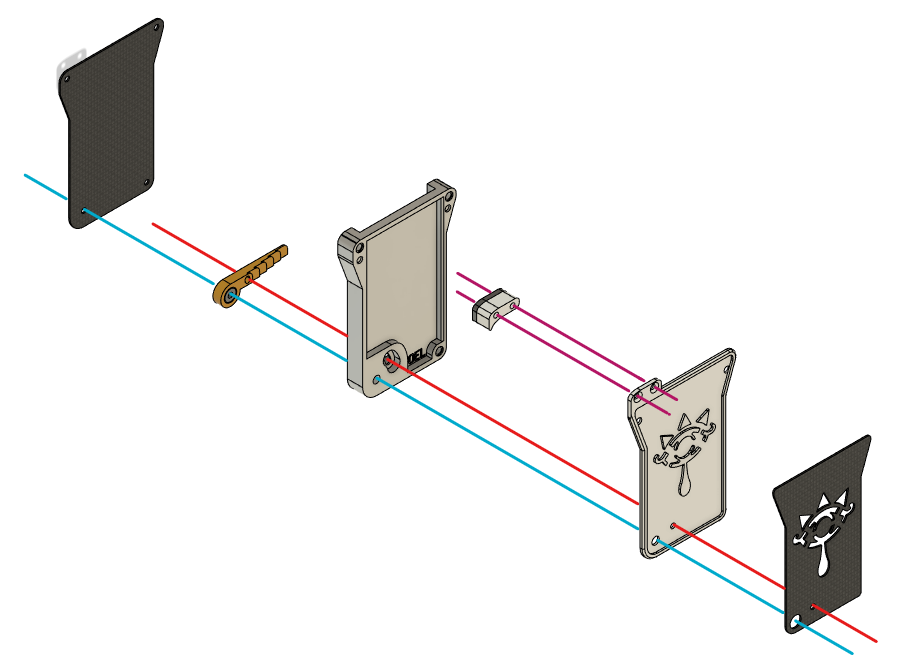
After some advice from REAL engineers in the office, I decided to revert back to FDM parts, but rely on carbon fibre sheets to strengthen the product. I also opted for magnets, over a ball plunger, as it was simpler and would help to keep the lid closed. To keep the FDM parts secured by the fasteners, I mounted heat set inserts into the FDM frame.
One final feature that bothered me was how much the lock nut protruded from the wallet. After some looking around, I found that an M3 rivet nut could be repurposed as a bolt, where I used the lip of the rivet to hold the wallet lid in place.
To address the squeezing problem between the rivet nut and bolt, I used aluminium spacers and washers to create a permanent pivot shaft for the lid to rotate on.
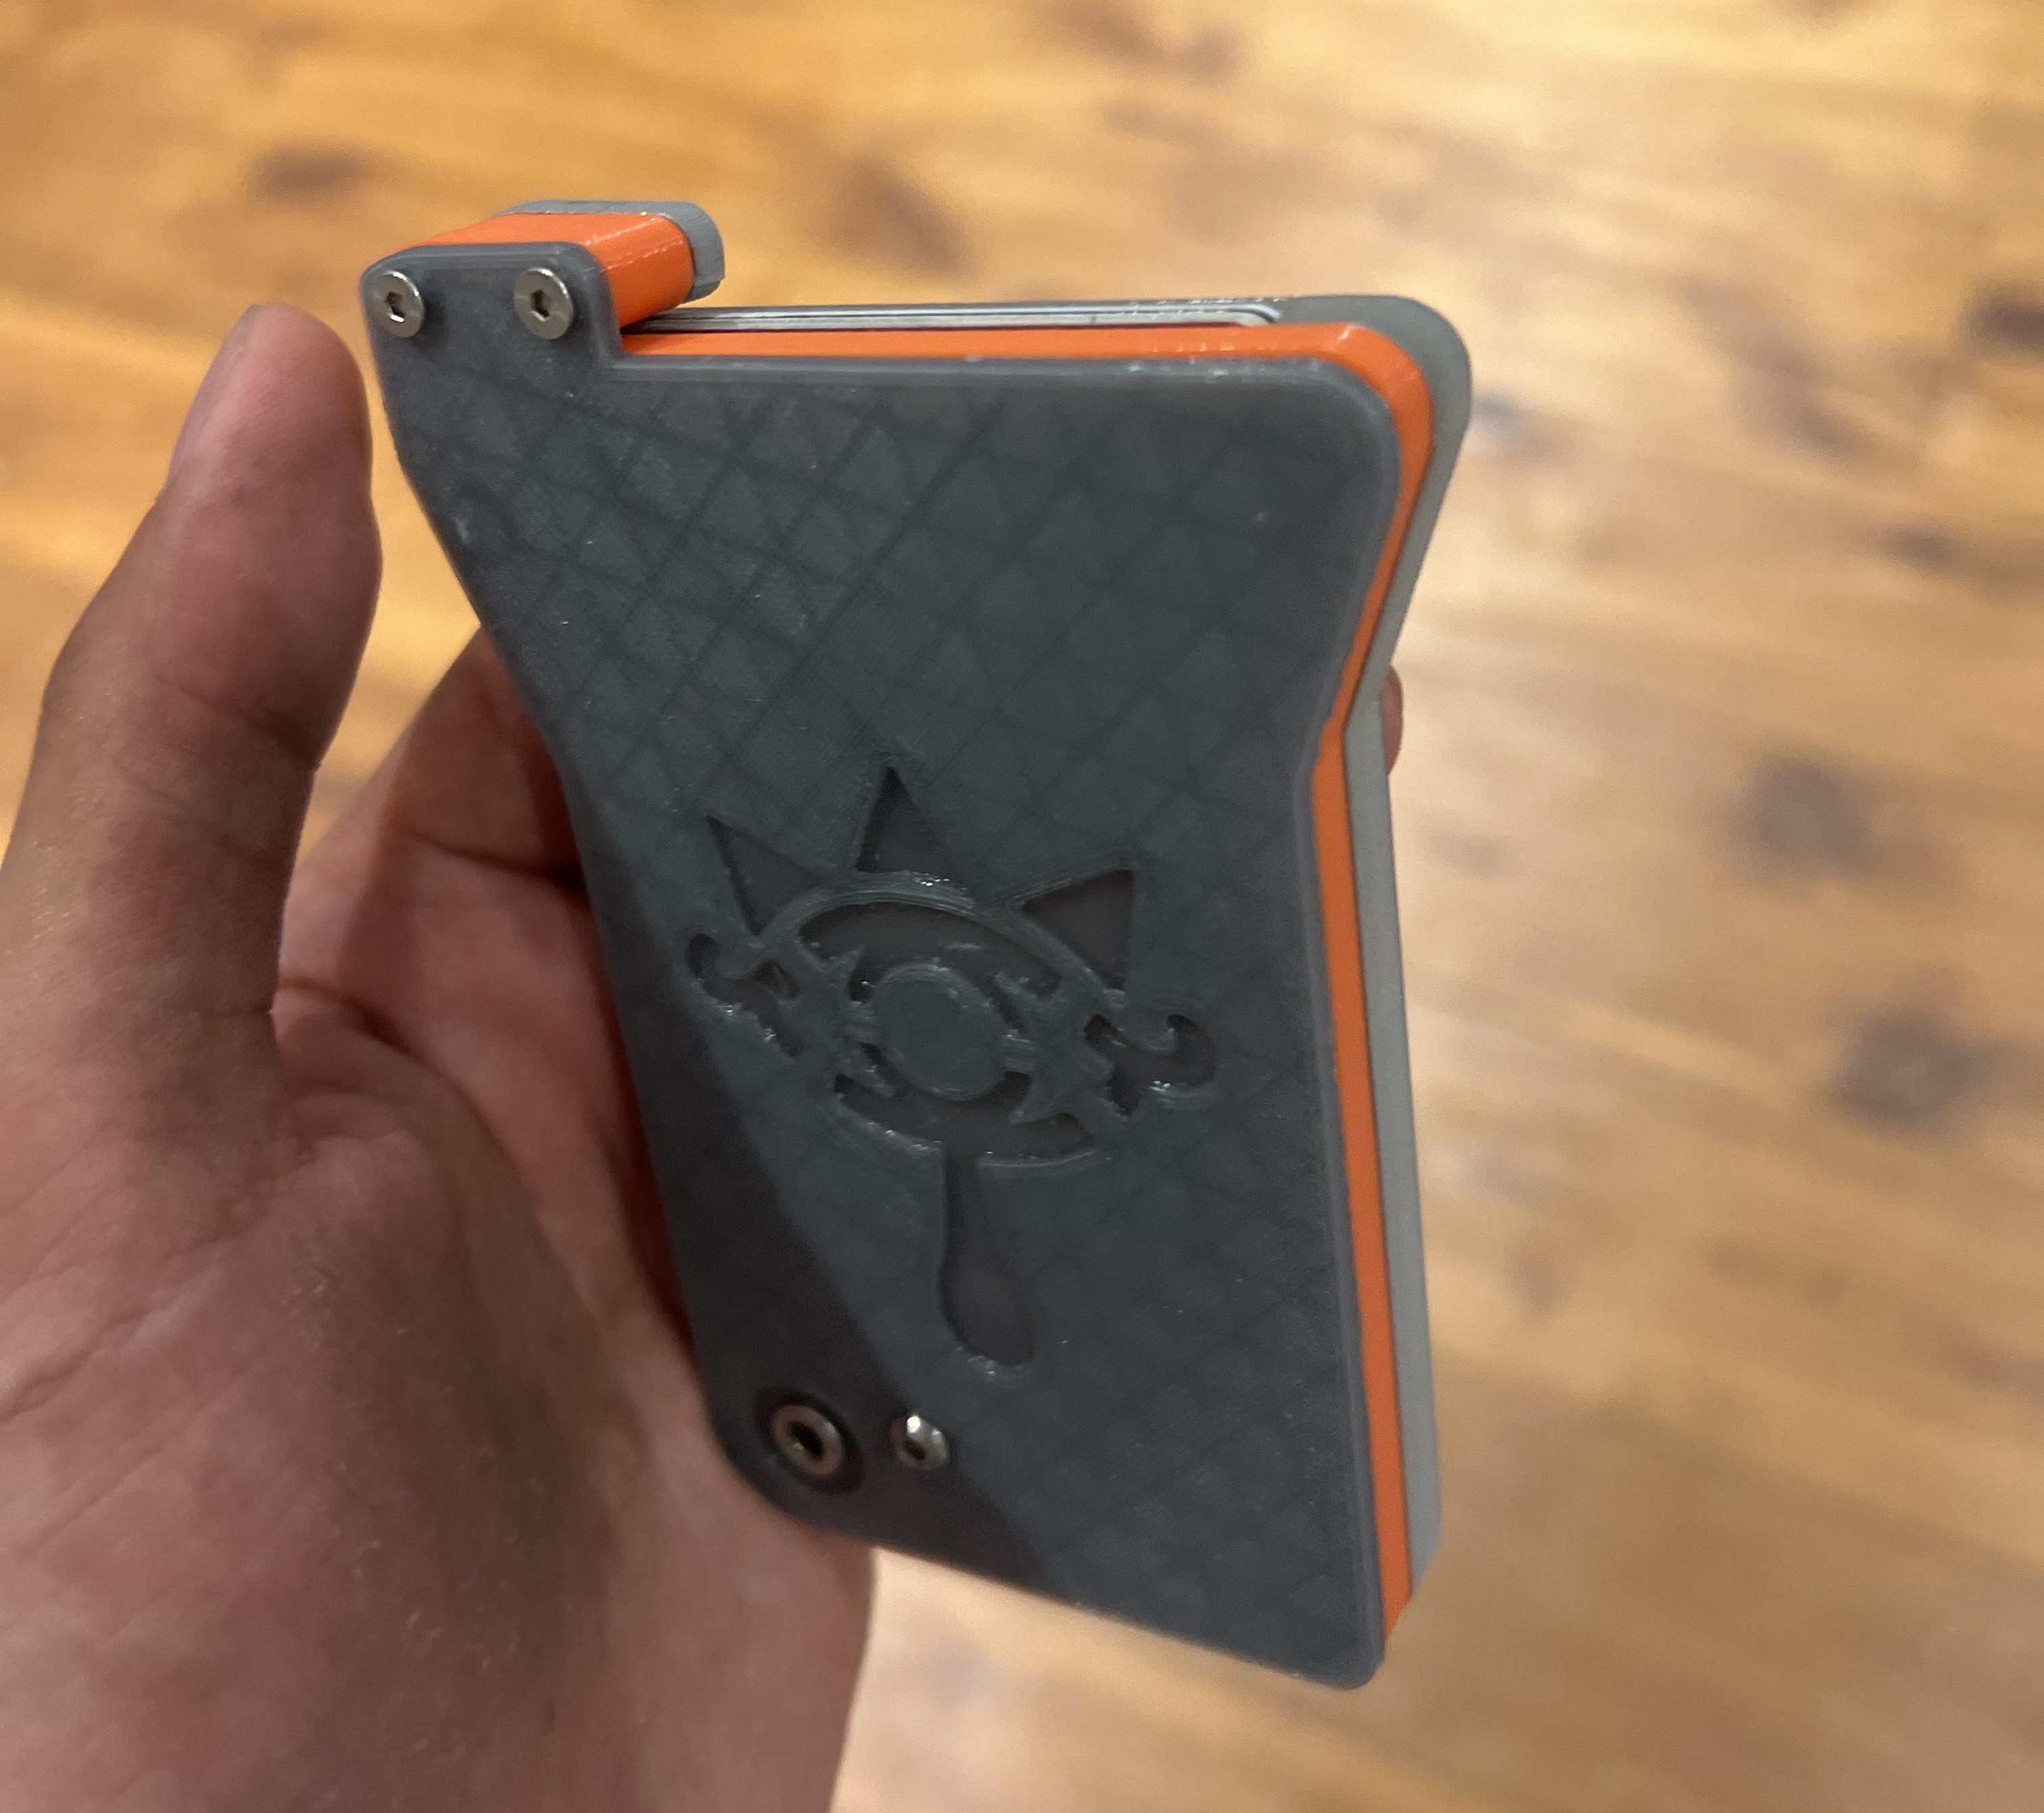
Mk3: Refined
Although the prototype was successful, the hard surface of PLA plastic was creating scratching sounds when the lid rotated. I opted for a softer DLP print for the lid, creating a nicer finish and circumventing the scratching issue.
I also produced a version with DLP internals, using press fitted hex nuts in place of heat set inserts to fasten them together. This was due to the thermoset properties of DLP (learnt the hard way).
When designing the wallet, I failed to consider the collision between the card cover (the part that prevented the cards from sliding out) and the cards in the wallet. This occurred because the cards did not retract early enough when closing the wallet, causing the cover to crash into the cards.
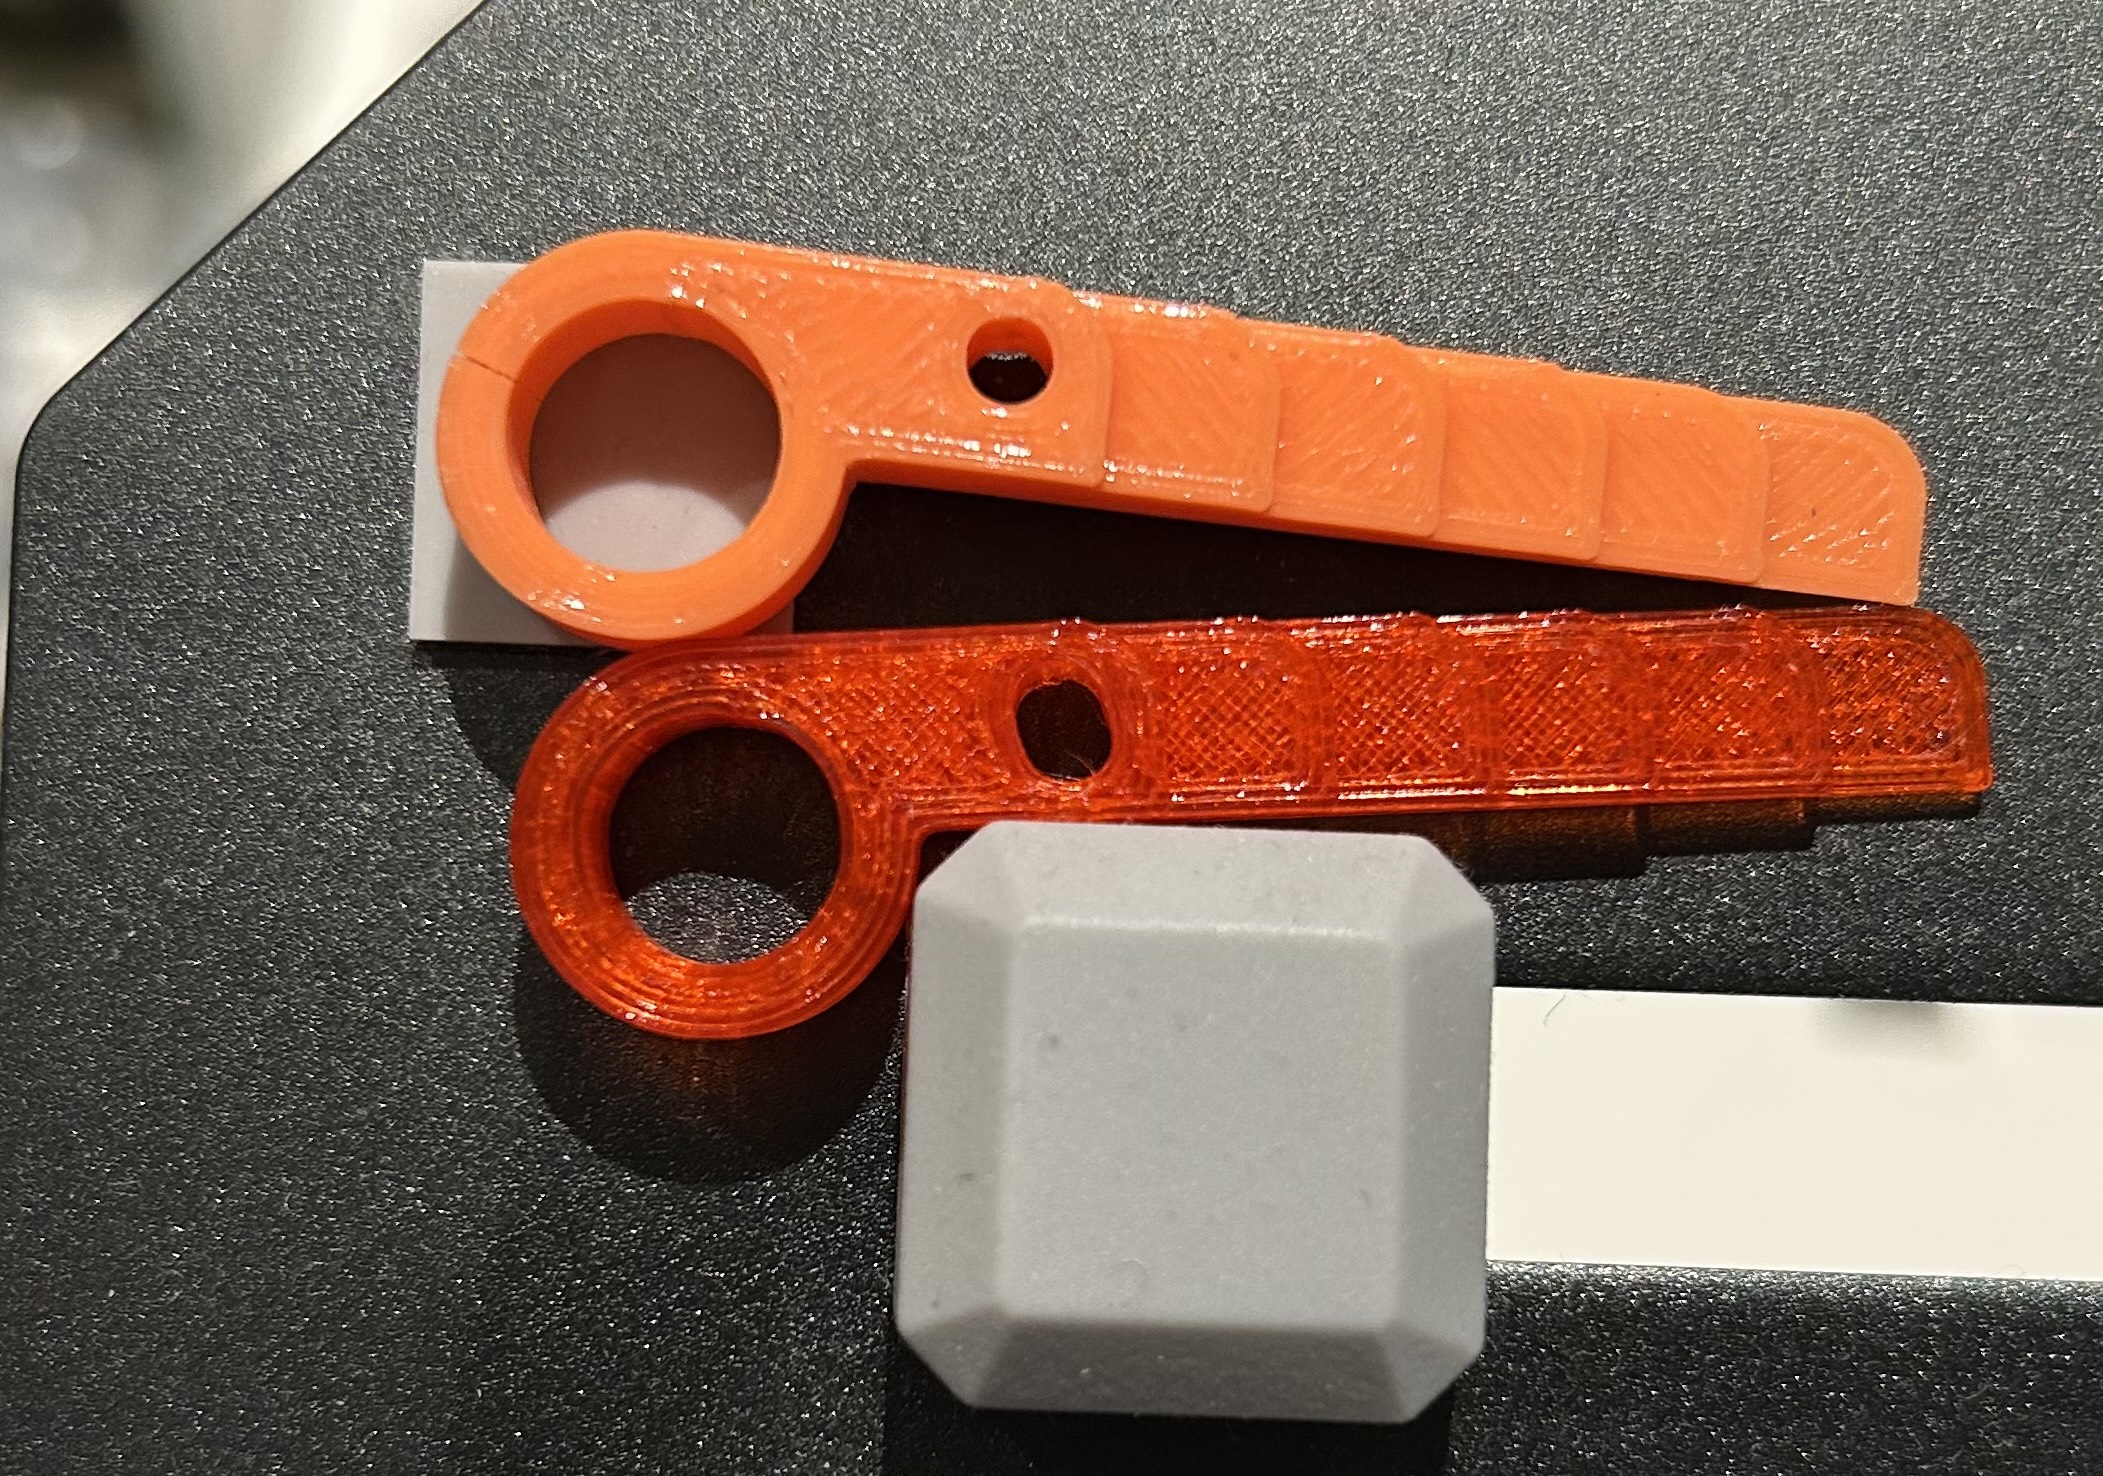
To solve this issue, I created an arc slot in the lever (see red lever above) to create 5° of lost motion between the lid and lever. This ensured that the lever reached the bottom of the wallet 5° before the lid.
Finally, I replaced the back cover and lid skin with prepreg C3K fibres that I salvaged from the workshop, cut using the waterjet. This increased the rigidity of the wallet exponentially, while keeping it light.
Learning Points
My biggest takeaway from this project was material selection. I realized how challenging it could be to select a material given the balancing act that is material properties. I also gained a hands on understanding of the properties of the materials I used (ahem trying to melt thermoset plastics ahem).
As my first forray into a full-scale design project, I also learnt to appreciate the design process, where it took me many many iterations to arrive at a version I was happy with.
Finally, working on this project allowed me to creatively apply manufacturing processes and tools that I learnt from the internship. Through this, I gained more experience on what I can and cannot do with the tools available, equipping me to better design in the future.
Areas for Improvement
If I were to commercialise the product, there are a few areas that I would like to improve upon:
Firstly, though rare, the product still faced reliability issues with regards to card retraction. The cards would sometimes get stuck on the way down, causing a collision with the card cover when closing.
Secondly, the number of cards and cash notes the wallet can hold is currently quite small. Unlike the expandable wallets from The Ridge Wallet and Aviator, my design relied on a fixed compartments which limits the capacity. However, this could definitely be improved.